
Linux终端动画程序

Linux终端动画程序
LuckyTigerGenact
Genact是一款由开发者svenstaro创建的活动模拟器,它的设计初衷是为了让用户看起来像是在执行重要的计算机操作,而实际上它只是在屏幕上产生一系列随机但看起来极其专业且忙碌的界面动画。从编译代码到数据加密,再到系统监控,Genact模仿了各种常见和技术性场景,让你成为同事眼中的“多任务处理大师”。

1 | A nonsense activity generator |
1.关闭远程登录,开机自动进入命令行
娱乐为主生产不要使用
步骤(适用于 CentOS 7/8/Stream):
1. 修改 getty@.service 的 systemd 配置
创建一个覆盖目录:
1 | sudo mkdir -p /etc/systemd/system/getty@tty1.service.d/ |
创建配置文件:
1 | sudo tee /etc/systemd/system/getty@tty1.service.d/override.conf <<EOF |
说明:
--autologin root表示自动以 root 登录 tty1%I是 systemd 的占位符,代表 tty1\$TERM注意转义$,否则会被 shell 解析
2. 重新加载 systemd 配置
1 | sudo systemctl daemon-reexec |
3. 确保系统默认进入 multi-user 模式(命令行)
1 | sudo systemctl set-default multi-user.target |
如果你当前在图形界面,可临时切换:
sudo systemctl isolate multi-user.target
4. 重启验证
1 | sudo reboot |
系统启动后应直接进入 root shell,无需输入用户名和密码。
2.开机启动Genact
这个是官网的地址: Releases · genact (github.com)
从github上下载对应架构的linux端程序
步骤 1:创建或更新服务文件
1 | sudo tee /etc/systemd/system/genact.service <<EOF |
✅ 关键点:
ExecStart=/home/test/genact -m docker_build:正确传递参数- 未设置
User=,所以以 root 身份运行 - 所有 I/O 绑定到
/dev/tty1,确保前台显示 - 我的genact放在了 /home/test文件夹中,实际路径要看你放的路径
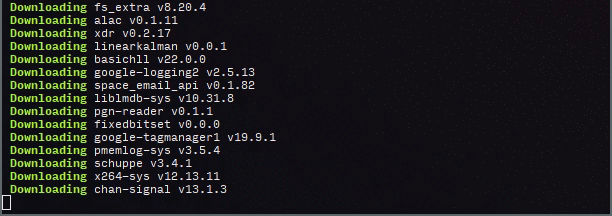
- -m docker_build 这是指定模式启动
步骤 2:确保程序可执行
1 | sudo chmod +x /home/test/genact |
步骤 3:禁用 tty1 的登录提示(避免冲突)
1 | sudo systemctl disable getty@tty1.service |
步骤 4:重载并启用服务
1 | sudo systemctl daemon-reload |
步骤 5(推荐):设为文本模式启动(非图形界面)
1 | sudo systemctl set-default multi-user.target |
如果你不需要 GNOME/KDE 等桌面环境,这一步能确保
tty1完全由你的程序控制。
步骤 6:重启测试
1 | sudo reboot |
重启后,你应该看到类似 Docker 构建日志的滚动动画(genact -m docker_build 的效果),全屏显示在主控制台,无登录提示。